DIY Hanging Living Terrariums
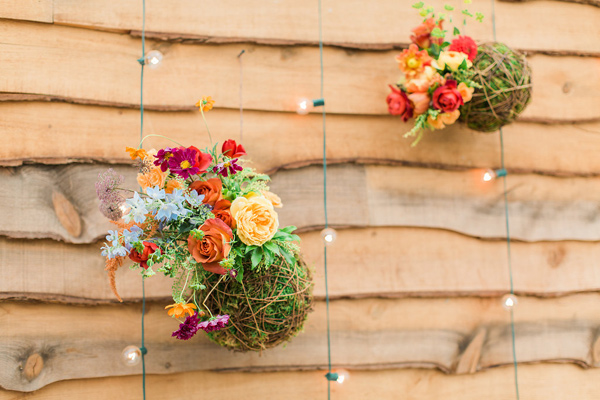
If you caught today’s shoot at Terrain, chances are the hanging root balls grabbed your attention. We love the idea of using these as terrariums and displaying all sorts of beautiful flowers, both indoors and out! Thank you Jessica Cooper Photography and Sebesta Design for sharing your tips.

For this project, you will need:
-(1) Grapevine ball of 6” or larger
-Moss
-Wax tissue
-Plastic Sandwich Bag
-Tape or Bindwire
-Flowers
-Floral Snippers
-Wire
-Wire cutters
-Water

Instructions:
Step 1: Take your grapevine ball, find a large hole and push the vine open so you can have enough room to put your hand inside.
Step 2: Take your moss, green side out and layer the inside of the ball, covering all of the open outer space. If it moves, you can push it a little harder and wedge it through the vine.


Step 3: To help hold the moss in place as well as create a supportive base to hold your flower cluster in place, ball up wax tissue and stuff inside the ball. Leave some room towards the opening so you can hide your flowers stems inside the ball.

Step 4: Create a little handheld bouquet and tie it together.

Step 5: Put some fresh moss in the bottom of your sandwich baggie and moisten it to provide a water source for your flowers.

Step 6: Cut the bouquet stems, just long enough so that all of the stems will reach the wet moss, but short enough that they fit inside the bag as well as inside the ball.
Step 7: Place the bouquet inside the baggie and tie the baggie closed with heavy waterproof tape or bind wire.

Step 8: Place the flowers inside the ball and secure with additional wax tissue and moss if necessary.

Step 9: Find a couple of supportive vines around the opening where the flowers have been set and twist wire around them, creating a closed hook to hang the ball from.

Step 10: Add some more bind wire or string to hang the ball and enjoy!


These are lovely, Cori!